The Maytag MVWC565FW1 repair manual is a comprehensive guide for troubleshooting, repairing, and maintaining your washer. It provides detailed steps, diagrams, and part lists to ensure effective DIY fixes. Available as a PDF or paperback, the manual is accessible through Sears Parts Direct and other trusted sources, offering essential support for extending the life of your appliance.
1.1 Overview of the Maytag MVWC565FW1 Washer Model
The Maytag MVWC565FW1 is a 4.8 cu. ft. top-load washer designed for reliable performance and efficiency. It features a stainless steel tub, IntelliClean wash system, and advanced moisture-sensing technology; This model is known for its durable construction and user-friendly interface, making it a popular choice for households. The washer includes multiple cycle options and a robust motor, ensuring thorough cleaning and gentle care for fabrics. With its compact design and energy-efficient operation, the MVWC565FW1 is built to handle heavy-duty laundry tasks while maintaining low water and energy consumption. This overview provides a foundation for understanding the washer’s components and features before diving into repair procedures.
1.2 Importance of Using the Repair Manual
Using the repair manual for the Maytag MVWC565FW1 is crucial for safe and effective repairs. It provides detailed step-by-step instructions, diagrams, and part lists to guide users through troubleshooting and fixing issues. The manual ensures that repairs are done correctly, preventing further damage to the washer. It also helps in diagnosing problems accurately, saving time and money. Additionally, the manual includes safety precautions to avoid hazards during repairs. Available in PDF or paperback formats, it is accessible through Sears Parts Direct and other trusted sources. Regular use of the manual helps maintain the washer’s performance and extends its lifespan.
Parts and Tools Needed for Repair
The repair manual lists essential tools and parts required for fixing the Maytag MVWC565FW1 washer, ensuring you have everything needed for efficient and safe repairs.
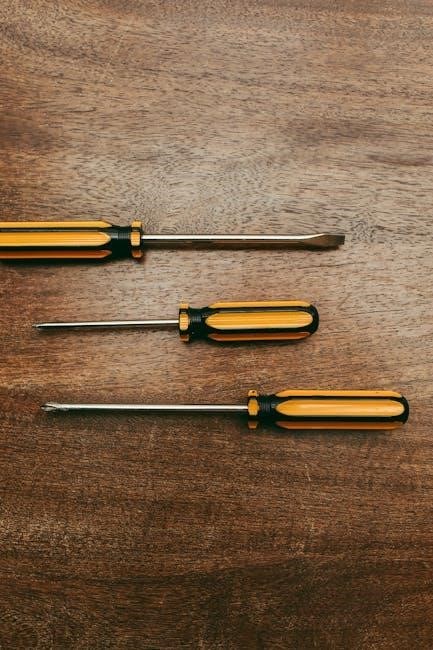
2.1 Essential Tools for DIY Repairs
For DIY repairs on the Maytag MVWC565FW1 washer, essential tools include a Phillips screwdriver, Torx driver, adjustable wrench, pliers, and a socket set. These tools enable safe disassembly and component access. Additionally, gloves and safety goggles are recommended to protect against sharp edges and electrical components. A multimeter may be needed for diagnosing electrical issues. Ensure all tools are of high quality to avoid damaging the appliance. Refer to the manual for specific tool requirements for each repair procedure. Proper tools are crucial for successful and efficient repairs, minimizing the risk of further damage or safety hazards.
2.2 Common Replacement Parts for the MVWC565FW1
Common replacement parts for the Maytag MVWC565FW1 washer include the tub bearing, wash motor, and control board. These components often require attention due to wear and tear. The tub bearing, located at the bottom of the tub, may need replacement if leaking or causing noise. The wash motor is critical for agitation and spinning, and failure may necessitate a new motor. The control board manages the washer’s operations and may need replacement if there are electrical or programming issues. Other parts, such as the door lock and water pump, may also require replacement. Ensure to source genuine Maytag parts for reliability and compatibility. Sears Parts Direct and the official Maytag service manual are excellent resources for identifying and purchasing these parts.
Common Issues and Diagnostic Steps
The Maytag MVWC565FW1 often experiences issues like leaks, unusual noises, or failed cycles. Diagnostics involve checking error codes, inspecting hoses, and testing electrical connections to identify faults efficiently.
3.1 Identifying Common Problems with the MVWC565FW1
The Maytag MVWC565FW1 washer commonly experiences issues such as leaks, unusual noises during operation, and failure to complete wash cycles. Leaks often stem from worn tub seals or loose hose connections. Noises may indicate problems with the tub bearing or imbalance during spinning. Failed cycles can result from faulty sensors, a malfunctioning control board, or incorrect error codes. The repair manual provides detailed diagnostic steps to identify these issues, ensuring accurate troubleshooting. By addressing these common problems, users can restore their washer’s functionality and prevent further damage. Regular maintenance, as outlined in the manual, helps mitigate these issues and extends the appliance’s lifespan.
3.2 Step-by-Step Diagnostic Procedures
To diagnose issues with the Maytag MVWC565FW1, start by checking the error codes displayed on the control panel. These codes provide specific clues about the problem, such as issues with the lid switch, water temperature, or drain system. Next, inspect the washer for visible signs of damage or wear, such as leaks around the tub seals or loose connections. Test the power supply and ensure all electrical connections are secure. Use a multimeter to verify the continuity of sensors and switches. If the motor fails to operate, check for blockages in the drain pump or debris in the tub. Refer to the repair manual for detailed diagnostic charts and troubleshooting guides tailored to this model. By following these steps, you can identify the root cause of the problem efficiently and proceed with the appropriate repair.

Disassembly and Accessing Internal Components
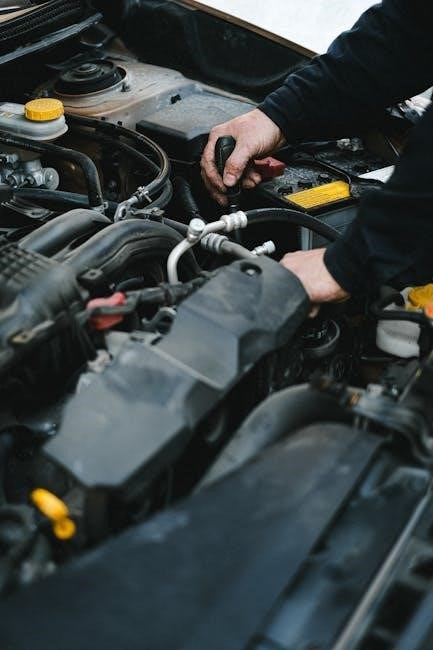
Start by removing the top panel and disconnecting electrical connectors. Carefully take out the tub to access the motor and control board. Ensure safety by unplugging the washer and wearing gloves during disassembly.
4.1 Safe Disassembly Techniques
Always unplug the washer before starting disassembly to ensure safety. Wear gloves and safety goggles to protect yourself from sharp edges or debris. Begin by removing the top panel using a screwdriver, taking care not to damage any electrical connectors. Disconnect all hoses and drain the water from the tub to prevent spills. Use a socket wrench to remove bolts securing internal components. Avoid forcing parts apart, as this may cause damage. Refer to the manual for specific instructions on accessing the tub, motor, and control board safely. Proper disassembly ensures a smooth repair process and prevents further damage to the appliance.
4.2 Accessing the Tub, Motor, and Control Board
To access the tub, motor, and control board of the Maytag MVWC565FW1, start by removing the top panel using a screwdriver. Disconnect the electrical connectors carefully to avoid damage. The tub can be accessed by detaching it from the frame, while the motor is located beneath the tub and may require removing the pump. The control board is typically located at the top rear of the washer and can be reached after removing the top panel. Always unplug the washer before starting and refer to the manual for specific instructions to ensure safe and proper access to these components for repair or replacement.
Repair and Replacement Procedures
This section covers repairs and replacements for parts like the tub bearing, motor, and control board. It includes step-by-step instructions, genuine parts advice, and troubleshooting tips to help you fix your Maytag washer efficiently.
5.1 Replacing the Tub Bearing
Replacing the tub bearing in your Maytag MVWC565FW1 washer involves removing the tub and associated components. First, disconnect power and water supply. Use specialized tools to disassemble the washer. Carefully remove the tub and inspect the bearing for wear. Replace it with a genuine Maytag part to ensure compatibility. Reassemble the components in reverse order, ensuring all connections are secure. Proper alignment and lubrication are crucial for smooth operation. Refer to the service manual for detailed diagrams and instructions. This repair requires mechanical aptitude and attention to detail to prevent further damage and ensure optimal performance.
5.2 Fixing or Replacing the Wash Motor
Fixing or replacing the wash motor in your Maytag MVWC565FW1 washer requires careful disassembly and inspection. Start by disconnecting power and accessing the motor, located near the tub. Check for blockages or debris that may interfere with operation. Inspect the motor for signs of wear or damage. If the motor is faulty, replace it with a genuine Maytag part to ensure compatibility. Reassemble the components in the reverse order of disassembly, ensuring all connections are secure. Refer to the service manual for specific instructions and diagrams. Proper installation is crucial for restoring normal wash operation and preventing future issues.
5.3 Replacing the Control Board
Replacing the control board in your Maytag MVWC565FW1 washer involves accessing the internal components. First, disconnect the power supply for safety. Remove the top panel by taking out the screws at the back. Locate the control board, usually mounted near the top or back, and carefully disconnect the wires. Remove the screws holding the old control board and replace it with the new one, ensuring all wire connectors are securely attached. Reassemble the panels and restore power. Test the washer to ensure proper function; Always use a genuine Maytag replacement part for compatibility and reliability. Follow the service manual for detailed instructions to avoid errors and ensure safety.

Maintenance Tips to Prevent Future Issues
Regularly check and clean the tub, gasket, and drain pump filter. Refer to the Maytag MVWC565FW1 repair manual for a detailed maintenance schedule and guidelines to ensure optimal performance and prevent breakdowns.
6.1 Regular Maintenance Schedule
Adhering to a regular maintenance schedule is crucial for the longevity of your Maytag MVWC565FW1 washer. Monthly, inspect and clean the drain pump filter to prevent clogs. Every six months, balance the washer to ensure stable operation. Annually, check the tub gasket for cracks and wear, and verify that the tub bearing is functioning properly. Additionally, ensure the detergent dispenser is free from buildup. For detailed maintenance timelines and procedures, consult the official Maytag MVWC565FW1 repair manual or service guide, which provides step-by-step instructions and diagrams to help you maintain your washer efficiently.
6.2 Preventative Measures to Avoid Common Problems
Preventative measures are essential to avoid common issues with your Maytag MVWC565FW1 washer. Regularly check for loose parts and tighten them to prevent noise or imbalance. Inspect the tub bearing for signs of wear and replace it if necessary. Ensure the washer is properly leveled to maintain stability during operation. Avoid overloading the washer, as this can strain the motor and other components. Use the recommended detergent to prevent buildup and clogs. Refer to the service manual for specific guidelines on maintaining your washer, such as checking the drain pump filter and ensuring all connections are secure. These steps will help extend the lifespan of your appliance and maintain its efficiency.
Resources for Further Assistance
Access the official Maytag service manual, Sears Parts Direct, and online forums for troubleshooting guides, part diagrams, and expert advice to address complex repair needs effectively.
7.1 Accessing the Official Maytag Service Manual
The official Maytag service manual for the MVWC565FW1 model is available for download as a high-quality PDF or can be purchased as a paperback. It can be accessed through trusted sources like Sears Parts Direct, which offers detailed repair guides, part diagrams, and troubleshooting steps. Additionally, online marketplaces provide digitized versions of the manual, ensuring easy access for DIY repairs. The manual covers essential repair projects, maintenance schedules, and diagnostic procedures, making it an invaluable resource for homeowners and technicians. By downloading or purchasing the manual, users can ensure they have the most accurate and comprehensive information to maintain their washer effectively.
7.2 Online Communities and Forums for Support
Online communities and forums are invaluable resources for Maytag MVWC565FW1 washer support. Platforms like Reddit’s r/ApplianceRepair and specialized appliance repair forums offer spaces to ask questions and share experiences. Many users have posted solutions to common issues, while experts often provide detailed guidance. Additionally, Facebook groups dedicated to appliance maintenance can connect you with experienced technicians and DIY enthusiasts. These communities are particularly helpful for troubleshooting unique problems or clarifying repair steps. By engaging with these forums, you can gain insights, avoid common mistakes, and ensure your repairs are done safely and effectively. They complement the official manual, offering real-world advice and support.
The Maytag MVWC565FW1 repair manual serves as a vital resource for maintaining and repairing your washer. By following the outlined procedures, you can address common issues effectively. Regular maintenance and timely repairs will extend the life of your appliance. The manual’s detailed instructions, combined with online resources and community support, empower you to troubleshoot and fix problems confidently. Always refer back to the manual for specific guidance, and don’t hesitate to seek additional help when needed. Proper care and repair will ensure your Maytag washer continues to perform optimally for years to come. Remember to prioritize safety and precision in all repair tasks.
